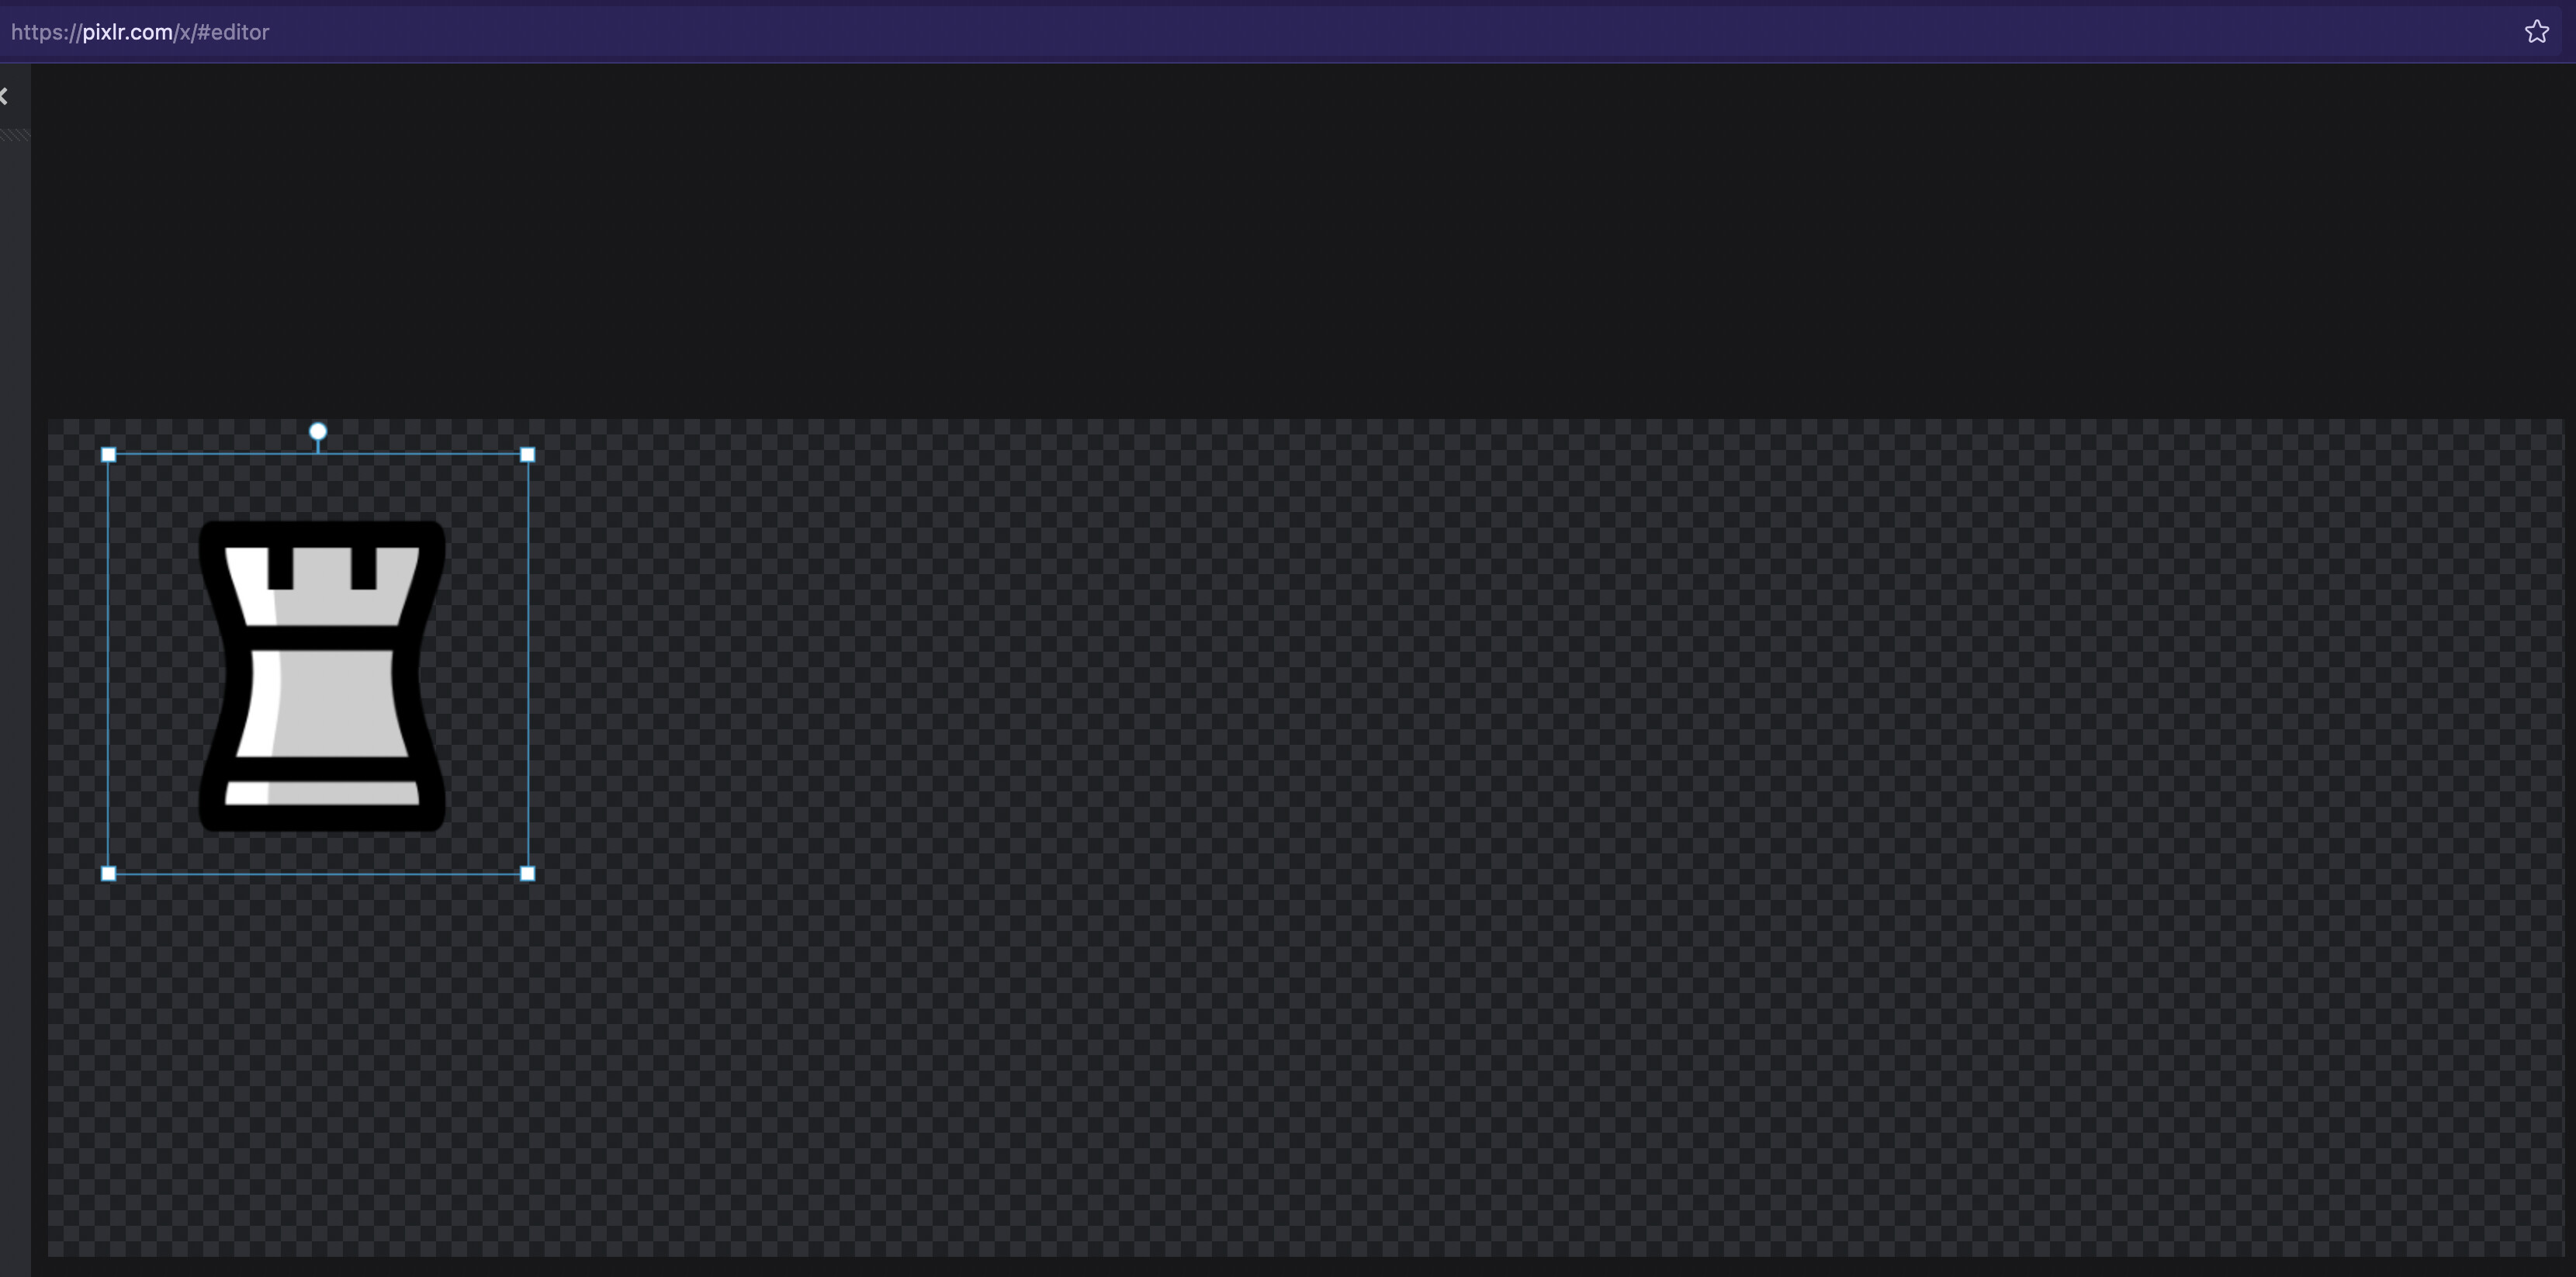
When I import a PNG file that has transparent pixels originally, Acorn seems to automatically trim it out. Is there a way to keep the transparent pixels when importing the PNG image? What I want is something similar to what Pixlr does when importing the PNG image. I hope I do not sound unclear. Thank you in advance for your help!
If you open the PNG in a new window then you can select all > copy, and then when you paste into your working document it will retain the selection including transparent pixels.
I did exactly that, but the problem persists. The transparent pixels get automatically trimmed when I paste it into my working document. Thank you for the reply.
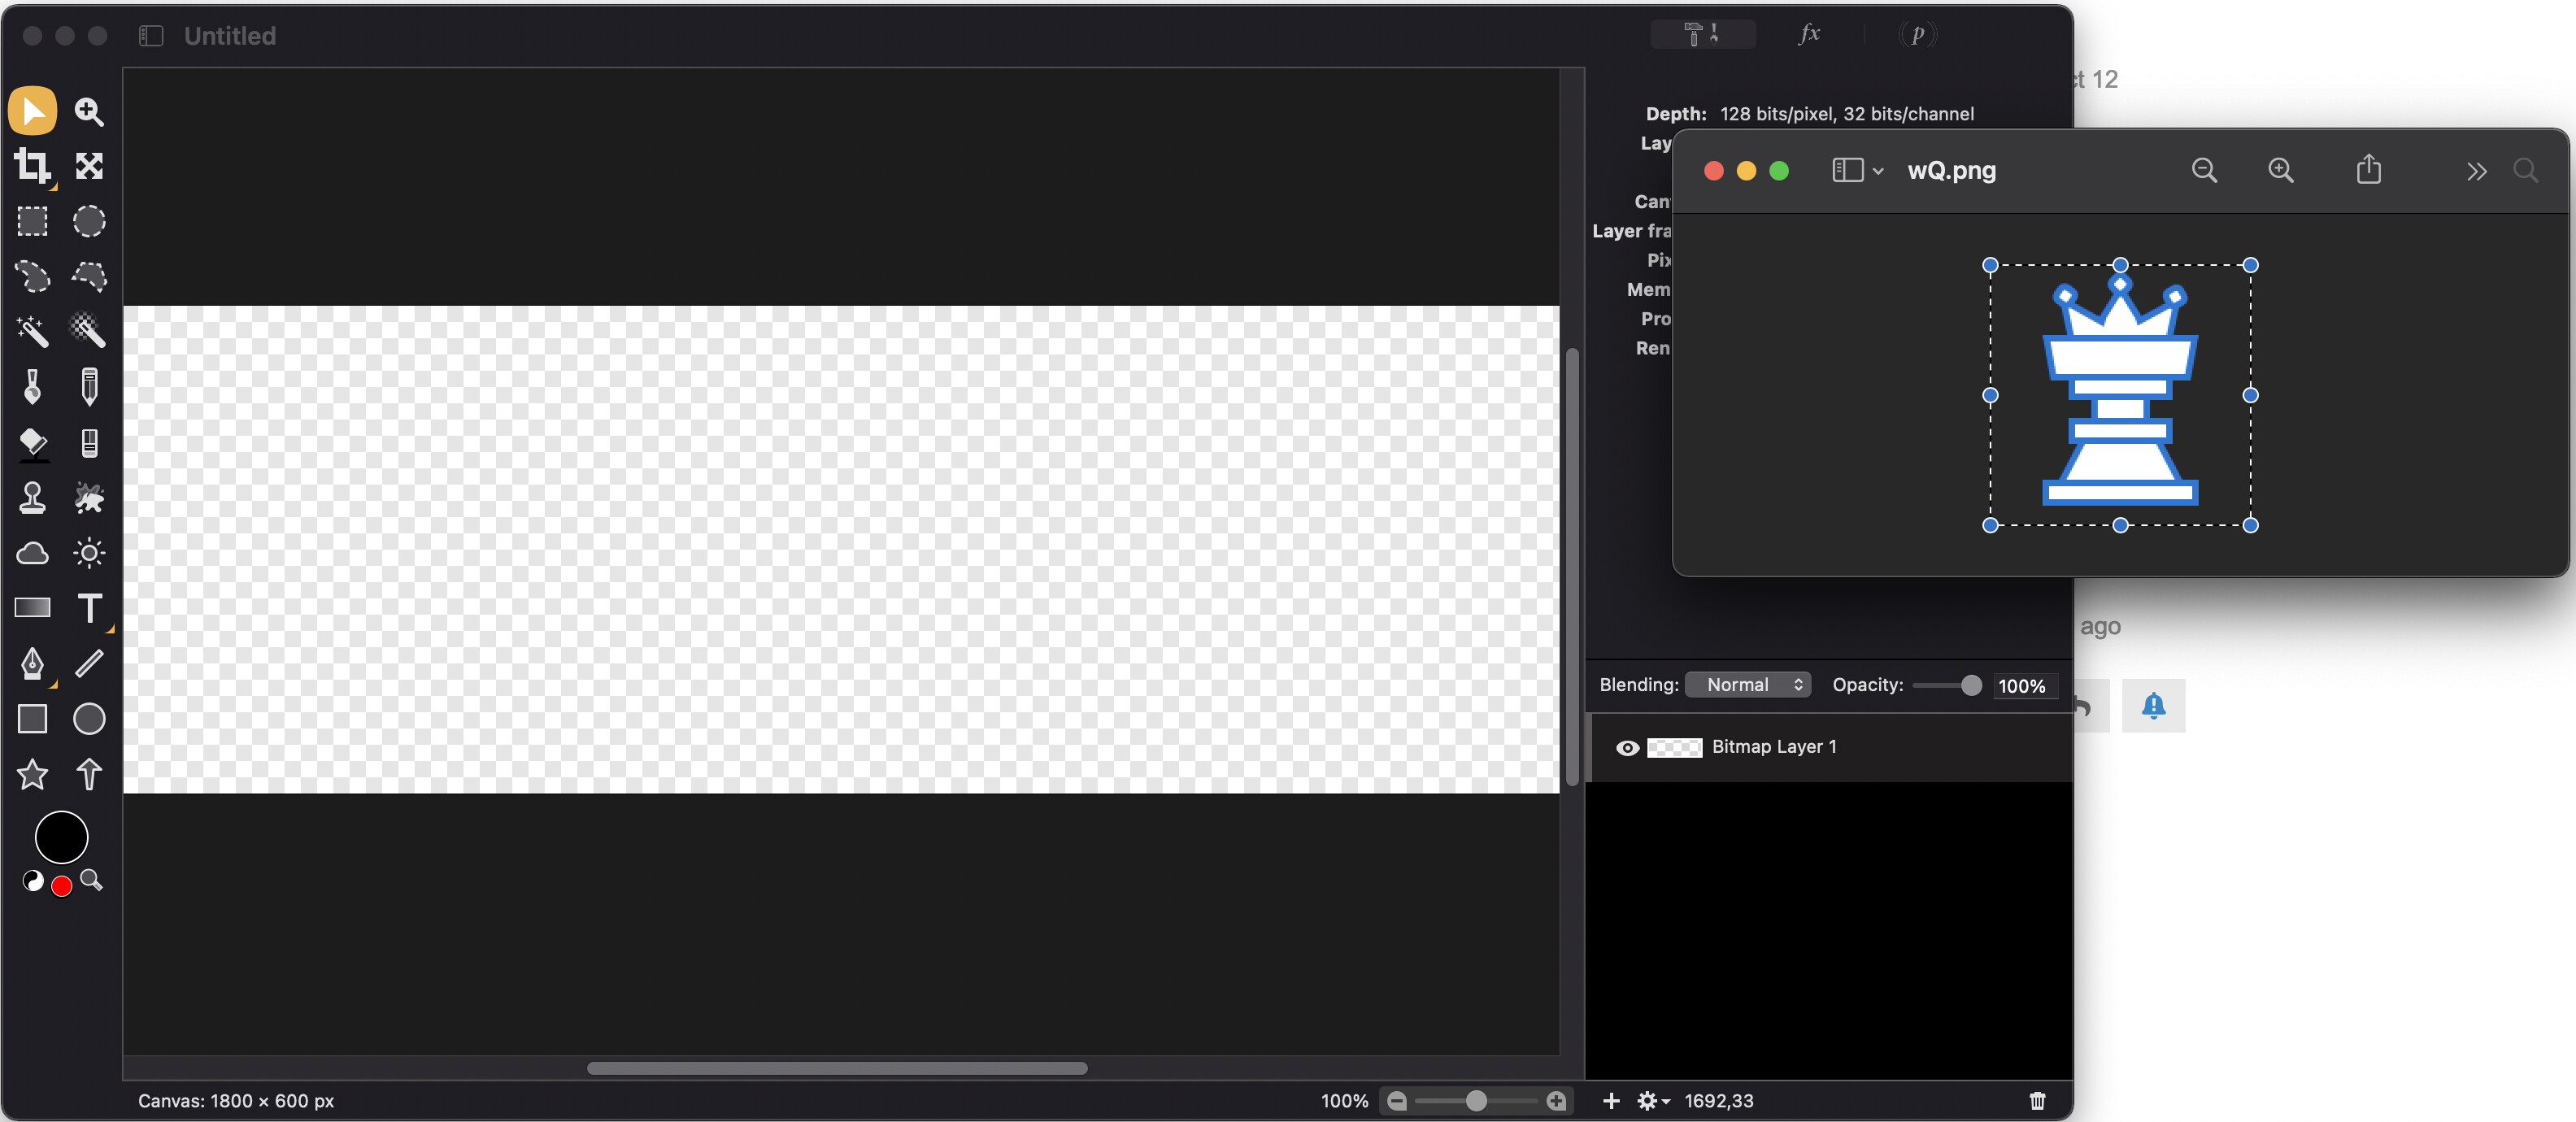
And this is what happens when I paste it into Acorn. The transparent edges are gone. If it worked for you, I am probably doing something wrong. I wish I knew what it is. I am absolutely sure that it was originally a PNG that Preview opened up as you see from the screenshot.
OH - it’s not that the transparent edges are gone, it’s that when you do a Scale and Rotate of a bitmap layer, Acorn will trim out the transparent edges of a layer so that you get the opaque bounds.
If you use File ▸ New from Clipboard in Acorn, then you’ll get your image with the transparent edges. Try that out!
If I do “new from clipboard,” it opens the image in another tab with the transparent edges. That’s all great and fine, but my problem is how to get Acorn to NOT trim out the transparent edges when I do a Scale and Rotate. I found a kind of tedious solution, and that is to go to preset selection, choose “square,” scale the height and width, center the PNG image in the center of that box, and then move it. Is there an easier solution?
The select all, and then copy, should be adding all the pixels from the selected area. You mentioned in a previous post that this wasn’t working for you - but can you double check? It works exactly the same way as your square preset selection idea.
I apologize for the late response; I probably overlooked an email notification.
I tried “select all” and “copy” after I did “new from clipboard.” Then I pasted the image on the other tab with the larger canvas size. The same problem persists. Every time in Scale and Rotate, the transparent edges are automatically trimmed out. May you confirm that this is not the case for you?
This isn’t the case for me, the transparent pixels are still around.
Can you make a little video of all the steps you’re doing, from start to finish, and send it to support@flyingmeat.com? Maybe we’re just doing things slightly different, and it’s making the transparent pixels not happen.
I apologize again for the late response. I just want to inform you that I sent an email to support@flyingmeat.com. Please inform me if you have not received the email yet. Thank you for responding and bearing with me; I appreciate it!
After the copy, you’re pasting it into an existing image and then using a transform, which will cut out the transparent edges. If you want to know if the transparent pixels are going along with the copy, you’ll need to use the New from Clipboard menu item (or another technique - see below). Using the Scale and Rotate command to test for the bounds of a layer won’t be reliable since it’ll always draw the handles to the opaque bounds of the image.
A more reliable way to to check for the bounds of a image when pasted into an already open canvas (which might be bigger than the copied layer), is to press ‘v’ twice quickly. That’ll bring up a little inspector palette which will show stats about the image, and the current layer. The “Layer frame:” will let you know the dimensions of the current layer independent from the overall canvas size.
Thank you for the response. My problem is not with checking the bounds of the image. The issue is that I cannot seem to find a way to drag the image with the transparent pixels. For example, I want the image that is pasted on an already existing canvas to have 160 x 160 bounds when I am dragging it around (because I want it to be a particular distance away from the edges), but I am not getting what I want because no matter what I do, the dragged image acts as if there are no transparent pixels. Basically, I want the pasted image on the already existing canvas to be 160 x 160, not 96 x 144. Is there a way to do that?