I have a brain fart with overlaying images in retrobatch…. but I’m hoping someone here could help. [nodes are labeled in square brackets]
MISSION (final)
I have created a seamless tile. I’d like to display how the tile will look in a larger format stitched together.
STITCHING (grid.jpg)
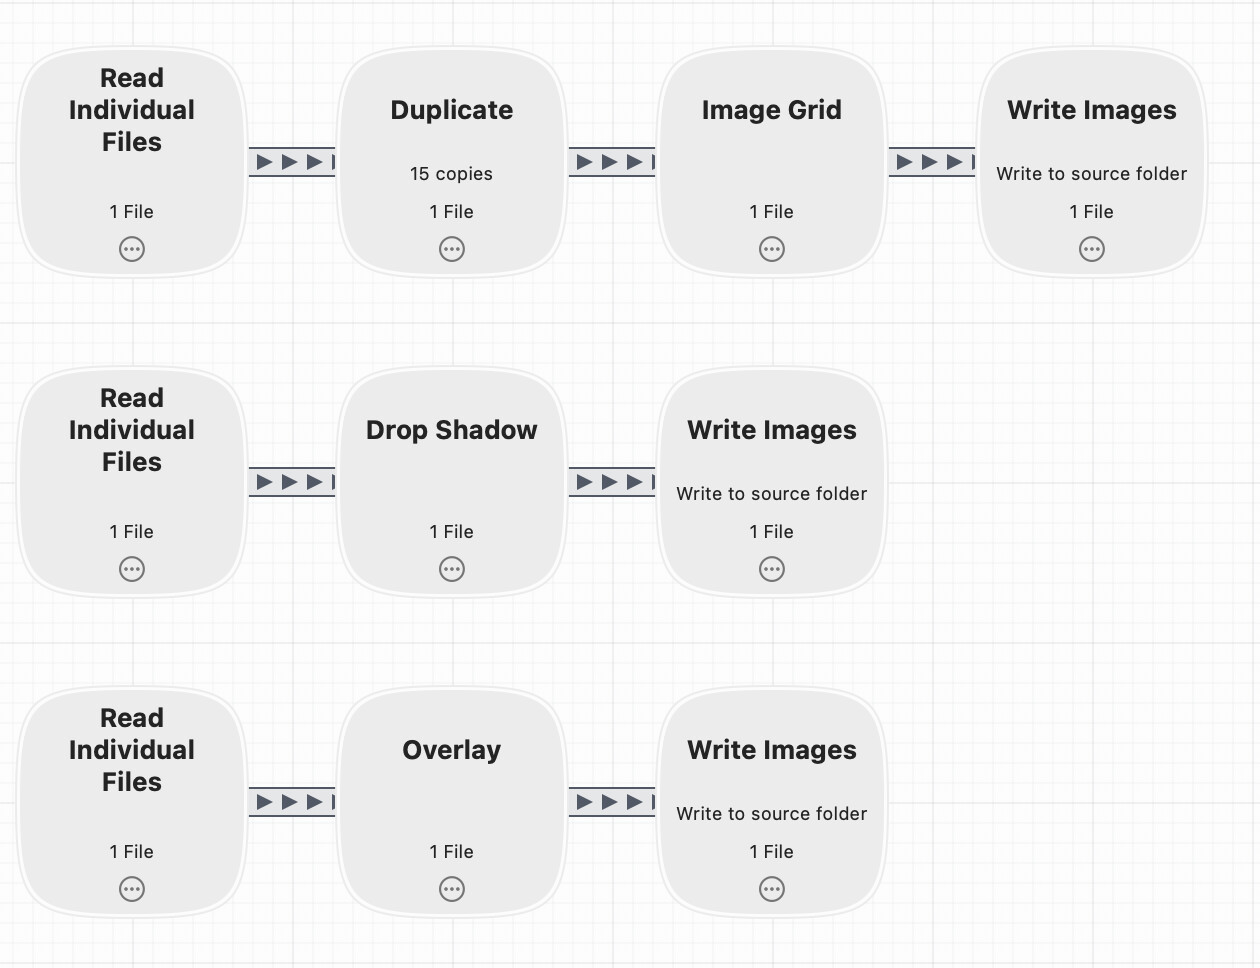
So what I have done is read in the image [read individual files].
I copied this image to the [clipboard].
I then duplicated [duplicate] the image 15 times
Used [image grid] and put the images into a grid of 5 across by three down (15). 3 rows of 5.
I then wrote the final image into a temp folder.
So far so good. No problem. But what I’d like to do now is take the original image and overlay it on top of the image I just created in the temp folder.
So I would like to overlay one image with a shadow on it, 2nd row 3 space over (see image)
**DELEMA (**retrobatch grid formula.jpg)
I started by reading the temp folder that contains the image, then somehow I need to be able to take that initial image and overlay it on top in that middle position with a glow applied to it.
The first group of nodes create the tile.
The second group creates the drop shadow.
The last one reads in the drop shadow, and the Overlay node uses the generated tile image.
In the overlay node, you set the image position to be the center, and it’ll show up three over, two down automatically.
You’ll have to run the workflow once first to generate the tile image, which will then be used in the Overlay node. That’s why it’s multi-step. Or you could make multiple workflows, but for this example, I just threw them all in one.
Thanks so much for the attention and solution. However, the dream was to have this be done in one pass.
But your solution got my brain out of the fart stage. I tried the clipboard theory again, but what I soon found out is that I would need multiple clipboards to make it work. Then I thought about what I was putting in the clipboard, which was the shadow effect. So what I ended up doing was creating the shadow effect, knocking out the center and then using the IMAGE WATERMARK node to add it to the image after the IMAGE GRID node.